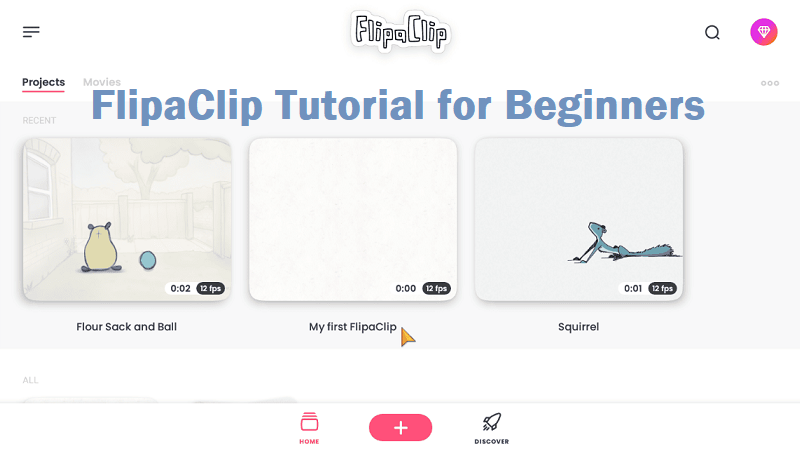
FlipaClip is one of the best animation apps for budding animators and hobbyists who want to create frame-by-frame cartoon animations. Its intuitive interface and powerful features make it ideal for animators of all skill levels, whether you're just starting out or already a seasoned pro. In this tutorial, we’ll walk you through the step-by-step process of drawing cartoon animations using FlipaClip. By the end, you'll have a complete understanding of how to create your very own animated cartoons!

Before you can start creating animations, you'll need to download and install FlipaClip on your device. It's available on both iOS and Android platforms, as well as on your PC or Mac using an Android emulator. Once installed, open the app, and let’s dive in!
Creating a New Project
Must Read: How to get FlipaClip premium app?
FlipaClip’s user-friendly interface consists of the following core tools:
Familiarizing yourself with these tools is essential as they’ll be your primary resources throughout the animation process.
#1 Start with a Rough Sketch
Begin your animation with a rough sketch. Use the brush tool to draw the basic outline of your characters or objects.
Don’t worry about making it perfect. The rough sketch helps you map out your animation before adding finer details.
#2 Utilize Layers
Layers are crucial in animation to keep your work organized. For example, create separate layers for the background, character outlines, and coloring.
To add a new layer, click the “+” icon in the layers panel. You can adjust the opacity to see your previous frames faintly, which helps in maintaining consistency.
#3 Onion Skin Tool
The Onion Skin tool allows you to see the previous and next frames while drawing. This is useful for smooth transitions and consistency.
Turn it on by tapping the Onion Skin icon (located in the toolbar) to reveal previous frames with a semi-transparent effect.
Also Read: Easy method to setup animation app on your PC Windows
#1 Frame-by-Frame Animation
FlipaClip uses a frame-by-frame animation method, meaning you’ll need to draw each frame individually to create a sequence. Start with your first frame, then tap the “+” button to move to the next frame.
Use the Onion Skin tool to align your drawings for smooth motion.
#2 Adjusting Frame Timing
Sometimes, you may want certain frames to stay on screen longer. To adjust the duration, tap on the frame, and you can duplicate or adjust its timing.
You can also reorder frames by dragging them in the timeline if needed.
#3 Adding Motion and Expression
To make your characters come alive, focus on subtle movements like blinking eyes, hair swaying, or changes in facial expressions.
Use the Lasso Tool to tweak parts of your character without redrawing the entire frame.
#1 Coloring Your Animation
Once your sketches are complete, use the Fill Bucket tool to color in your drawings. Be sure to close any gaps in the outline to prevent color spills.
For shading and highlights, add new layers above your base color and adjust their opacity for a softer effect.
#2 Refining Lines
Switch to a finer brush to trace over your rough sketches and add details. This step is called "inking" and gives your animation a polished look.
Use the zoom feature to refine small details, especially on your character’s face and hands.
#1 Importing Audio Files
Animations become more engaging with sound effects, music, or voiceovers. FlipaClip allows you to import audio files directly into your project.
Tap on the Audio icon, then select “Import” to add background music or sound effects.
#2 Recording Voiceover
You can also record your voice directly in the app by tapping the microphone icon. This is perfect for character dialogue or narration.
Align the audio with your frames in the timeline for synchronized sound.
You May Like: Get the cartoon app on your Mac device
#1 Exporting the Project
Once you’re satisfied with your animation, it’s time to export it. Tap the “Export” button in the top-right corner.
Choose your preferred format (MP4 is recommended for high-quality video) and select the resolution.
#2 Sharing Your Creation
FlipaClip makes it easy to share your creations on social media platforms like YouTube, Instagram, or TikTok. Simply choose the “Share” option after exporting.
Practice Consistency: Consistent character design across frames is key to professional-looking animations. Use guidelines or reference images if needed.
Use Shortcuts: Get familiar with FlipaClip's shortcuts to speed up your workflow, like duplicating frames or using the undo/redo buttons.
Experiment with Effects: Try using FlipaClip’s blending modes and opacity settings to create cool visual effects.
Conclusion
Creating cartoon animations with this FlipaClip tutorial is both fun and rewarding. By following this step-by-step guide, you can bring your creative ideas to life, whether you’re animating characters, objects, or abstract designs. The app’s intuitive tools make it easy to learn, even if you're a beginner. With practice, patience, and a bit of creativity, you'll be crafting impressive animations in no time. So grab your stylus (or just use your finger), fire up FlipaClip, and start animating today!